Now? Um... but I was doing stuff. Brian further explained that he had a unique commission for a 3/4 scale replica of a Belcher Islands Kayak. "OK", I thought. Then he dropped the bomb: this boat was to be built using methods as close to the original way as possible. I knew what this meant. It meant we would salvage wood off the beach, split it with hammer and wedges, and haul it back to Brian's place to be shaped with who knows what. Stone tools? Bone wedges? I couldn't resist the opportunity to be involved. I made a few phone calls. Fortunately, I was able to put off my other projects for a couple of weeks. I went for it.
When I arrived, Brian had already spent a day doing some of the fun work. Sitting on sawhorses were several beautiful hand split Western Red Cedar planks.

These were to become the gunnels and other longitudinal structural members. Actually, I should back up a bit. These rough planks represent much more than a day's work. The logs were salvaged by Brian--using a kayak--from the Nehalem River. Like the title says, we are building this craft from scratch. And I mean truly!
Here's some of the information we had to work with: A conjectural survey by Harvey Golden (www.traditionalkayaks.com)

We also were fortunate that Harvey provided us with about 80 pages of historical documents and pictures describing the construction of these craft; papers by Eugene Arima and Milton Freeman, and articles by David Zimmerly. Before we could begin, we had to study.
 |
| Some basic tools: froe, adz, drawknife, broad hatchet, brace, knife and hand drill. There's a lot one can do with these simple tools. Add a BFH, wedges and a crosscut saw and you can take over the world. |
The information Harvey provided us indicated that the gunnels were sort of S-shaped, like a regular boat plank. OK. Those of you who are boatbuilders know that it takes a lot of work to determine the exact shape of these planks, beginning with lofting, followed by moldmaking, lining off, then finally spiling a pattern for a plank. The Belcher Islanders had no need of such finery. They needed to build a boat fast to hunt seals so they could survive. The shape of the gunnels was pretty much cultural knowledge, and most men had the shape committed to memory. Brian and I weren't so fortunate, and since our job was to reproduce this kayak using traditional methods and tools, we couldn't follow present day boatbuilder's methods. We also realized the incredible amount of time that would be invested in building the gunnels from scratch, so we couldn't afford to ruin one. (No mistakes! Bad boatbuilder!) So, we built a miniature. Rather, Brian built it while I sharpened tools and offered comments peppered with a little heckling. It looked good, and it gave us the confidence to invest the time to build the full size gunnels.
 |
| Brian with his cute little miniature |
On day two, building began in earnest. We cut the rough planks to length...
...split them again with a froe...
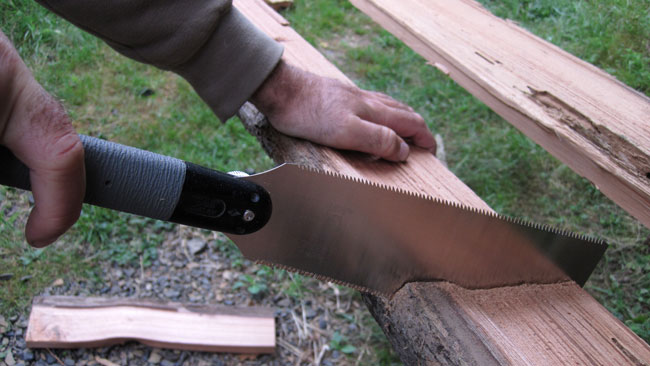
Then Brian transferred the measurements from his miniature to the planks. We sawed down to the line and chopped out the waste with a hatchet...


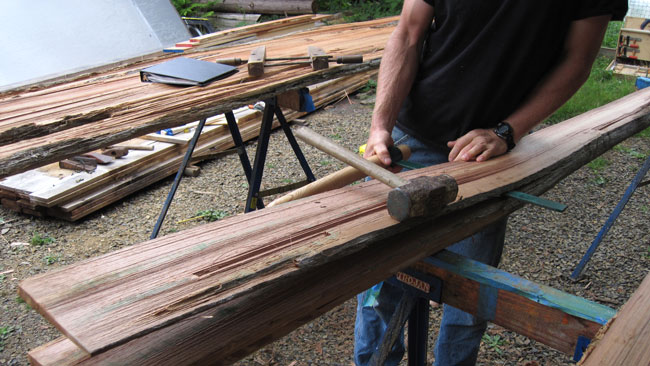
Creating a flat reference took time and a critical eye...
...until we discovered an easier way by referencing off an already flat board. I'm not sure the Belcher Islanders had such a reference, and if they didn't, they might have used twine pulled tight.
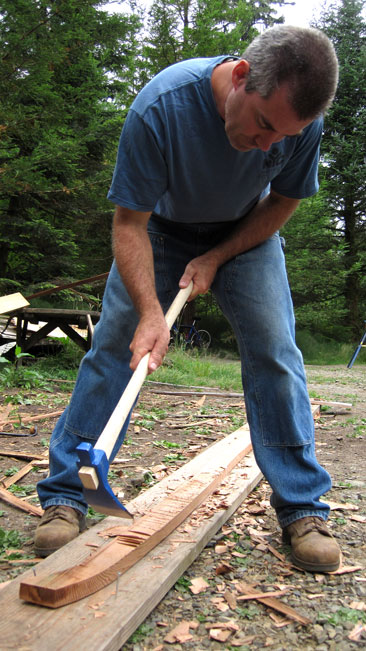
We planed them down...


Finally, we were able to tie the gunnels together into a boat shape...

Something didn't look quite right!

The miniature was a half scale model of our 3/4 scale commission. (Got that?) I was fascinated at how small the half scale appeared next to our full scale kayak:
 |
| The model is 1/2 the size of kayak we are building |
 |
| Funny thing about boats: if you double the length and width, you end up with roughly four times the volume. |


Then I made them pretty with a block plane after Brian said "it looks like hamburger" when I offered one up to the kayak. Peer review is always useful.


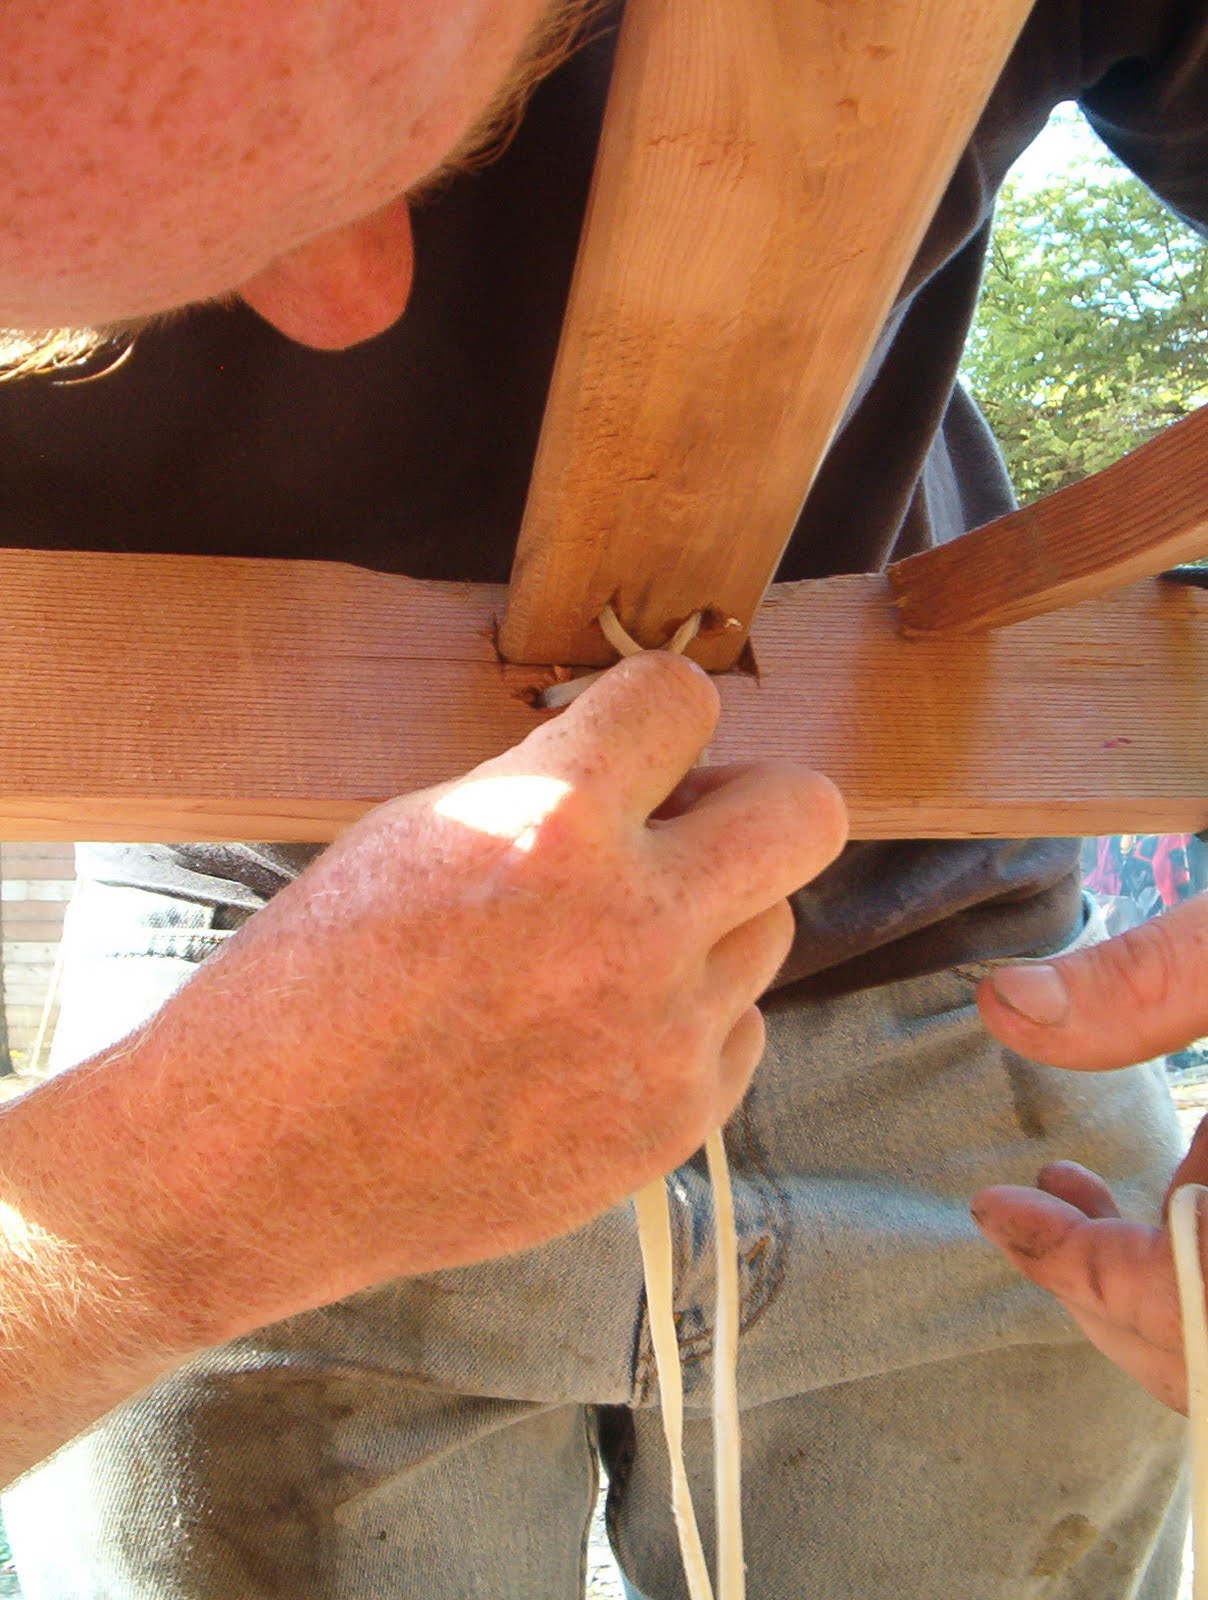
Meanwhile, Brian was busy lashing in the first curved deckbeam, the masik, with deer hide lashing he had traded for. Soaked in water overnight, this lashing is supple, incredibly strong, and shrinks when it dries. What more could you ask of a lashing? The only downside is that making deer hide sinew is incredibly time intensive; appropriate for this project.

To soften the ribs for bending, we boiled them in Brian's huge crab cooker over an impromptu open fire. We chose to test boil about five of the ribs before committing the whole bunch. With so much time invested in each components' manufacture, we are careful not to make any big mistakes. The test ribs bent well, and we will install the rest of them after the deck beams are in and the gunwales are mortised to receive the ribs.


On day five I staggered out to our work area to make more rib blanks out of impossible locust, and Brian spent most of the day building the two curved deck beams forward of the masik. The curved stock Brian was working with with proved frustrating, but he persisted in spite of cracked stock and limited supply.


We needed stock for the masik, a large curved deck beam immediately forward of the cockpit, and needed stock for the ribs as well. Nothing we had on hand would do, so we searched the beach for likely canidates. Unfortunately, I don't have pictures of our foray. Its just as well, because it wasn't a very fruitful trip; we returned with a single curved limb that we cut too short at the beach anyway. Most of our time was spent glassy eyed trying to make sense of the huge piles of driftwood, punctuated by the distraction of the sweet surfing waves. Upon our return, Brian began thinking on his feet, which is one of his best qualities. He's very good at it. In keeping with our mission of using salvaged wood, he came up with two ideas. For the masik he asked his artist friend Kathleen if he could pick through her sizable stash of driftwood. And two, for the ribs, he remembered a small sunken locust log on the North Fork of the Nehalem River that he encountered a couple years ago. Go here for that story, I didn't take my camera, and Brian tells it well.
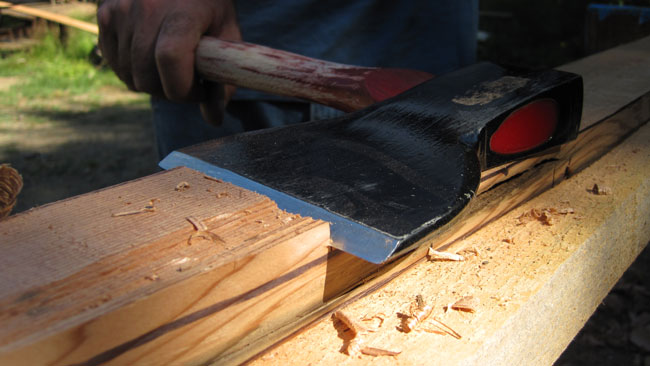
Day Four: The Grind. Since we had gathered all the stock we needed from yesterday's adventures, day four was dedicated to "production". Brian hacked away at the masik...

...and I got out rib blanks from what I am certain was the driest, most ornery log of locust I will ever experience:


Locust is great--its rot resistant, strong, and bends well, exactly the qualities a boat rib calls for. However, most boatbuilders use it sparingly because of the aformentioned ornery qualities, although its sometimes used for sawn frames in larger vessels, or small bits like blocks (pulleys), cleats, or belaying pins. I worked all damn day on rib blanks.
 |
| Oh my hand! I asked much of it today. |
To soften the ribs for bending, we boiled them in Brian's huge crab cooker over an impromptu open fire. We chose to test boil about five of the ribs before committing the whole bunch. With so much time invested in each components' manufacture, we are careful not to make any big mistakes. The test ribs bent well, and we will install the rest of them after the deck beams are in and the gunwales are mortised to receive the ribs.

At the end of Day Four: gunwales built, one deckbeam, and 5 gnarly ribs installed. We cracked some of them on purpose, because that's what the Belcher Islanders did to get the shape they wanted.

On day five I staggered out to our work area to make more rib blanks out of impossible locust, and Brian spent most of the day building the two curved deck beams forward of the masik. The curved stock Brian was working with with proved frustrating, but he persisted in spite of cracked stock and limited supply.

When he was satisfied with the shape, Brian carved out these simple blind mortises with a knife, it was quick, fairly easy, and historically accurate.

While I remained slave to the hewing axe, Brian finished installing most of the deck beams


Bending and installing ribs is an exciting and busy process, so I didn't get any pictures. Actually, Brian and I hurried out of habit! We are used to steaming, rather than boiling the ribs. When using a steam box, as little as 30 seconds either way makes all the difference. Boiling doesn't dry the stock, so we have almost infinite leeway.

Day Six: The old pros go to work. Having become used to unfamiliar tools and motions, we could concentrate on just getting things done. Most of my day was dedicated to hewing out chines, stringers and the keelson, which are longitudinal structural members that will be lashed to the ribs. Brian finished installing the deck beams, then cut mortises to to receive the ribs. Not bad--at least not bad for two guys with nothing but basic hand tools. We're becoming resigned to the time and effort this project is taking.
 | ||||
| Splitting out stringers with a froe. Then they are hewed with the axe in the background, then planed. |
 |
| Brian lashes in the deck beams. |
 |
| Mortises ready to accept the ribs. |
Its interesting to notice my attitude as this project rolls along. The very reason I agreed to take it on is also the very reason I complain! I was drawn to building this replica with basic hand tools only, then complain that its taking a long time and that my arms are sore. The result is a deep appreciation of the work of the Inuit inventors of this kayak. They had to work hard, yet in spite of that, and the pressures of just surviving on the Belcher Islands, they managed to produce lovely craft. The shapes are very sophisticated and show deep knowledge of boat design, and they are supremely adapted to their environment. I, for one, am impressed.
Day Seven: Ribs, coaming, and fire.
First thing in the morning I lit a fire under Brian's 20 gallon pot to boil the locust ribs. It was really nice to have a fire during the chilly morning!

Bending and installing ribs is an exciting and busy process, so I didn't get any pictures. Actually, Brian and I hurried out of habit! We are used to steaming, rather than boiling the ribs. When using a steam box, as little as 30 seconds either way makes all the difference. Boiling doesn't dry the stock, so we have almost infinite leeway.
 |
| Brian and 3/4 scale Belcher Islands Kayak. |
While Brian figured out some details, I hewed out the coaming stock out of the same dry tough locust that we used for ribs. I'm getting better with the 32 oz. broad hatchet, but I still feel the burn.
 |
| Reward! |
Day eight was mostly dedicated to replacing the masik and two deck beams because we weren't satisfied with the visual line of the single deck stringer when viewed from the side. It was an agonizing choice: Should we tear out two days of work? Just leave it? Both Brian and I knew that, in our hearts, we wouldn't be satisfied if we didn't fix it. So we did. Since we had stock on hand, and have become faster over the last few days, we were able to finish the fix in one day. We could afford to do this, but some craftspeople couldn't. Think about that next time you hire a carpenter for next to nothing, then complain that it isn't perfect. Every project is a prototype unless its made in a factory.

Day Nine: The bilge stringers needed to be built in a curve to fit, much like a garboard strake on a planked boat. So Brian built new ones, which is no small feat via the methods we have been using. I spent most of the day carving out a miniature paddle. Only seven feet long, the original I was copying was about ten feet. After I finished, Brian mentioned that the integral drip rings should have gone ALL AROUND the loom. Damn! I worked all day on this. What Brian said made sense, but the three paddle surveys Harvey Golden sent us clearly showed the drip rings protruding only on two sides. I followed the drawing carefully! Gah. At least I had bitchin' music to keep me company:


I'll finish this blog with a few pictures Brian took of the finished frame. Thanks Brian for the opportunity to build this, and to Harvey Golden for the research. I had a blast, even if my elbow is still feeling it over two months later!


Brian even lashed the deck stringers on. Again, the lashing is made of deer hide, soaked in water to make it pliable, and lashed according to Eugene Arima's 1962 paper: Notes on the Kayak and its Equipment at Ivuyivik.

I took some time to finish the coaming and fit the pieces nicely, while Brian copied a detail from Eugene Arima's paper that described bone and copper reinforement on the coaming to keep it from splitting.
 |
| Notice the copper plate on the bottom left of the coaming. |
 |
| End of the day: Deck beams replaced, deck stringers on, coaming perched on the boat. |


 |
| The copper wire was necessary to repair a split in the cedar. It was quite a relief to discover it had historical precedent! It takes a long time to build a paddle this way, and I didn't want to have to start over. |


